
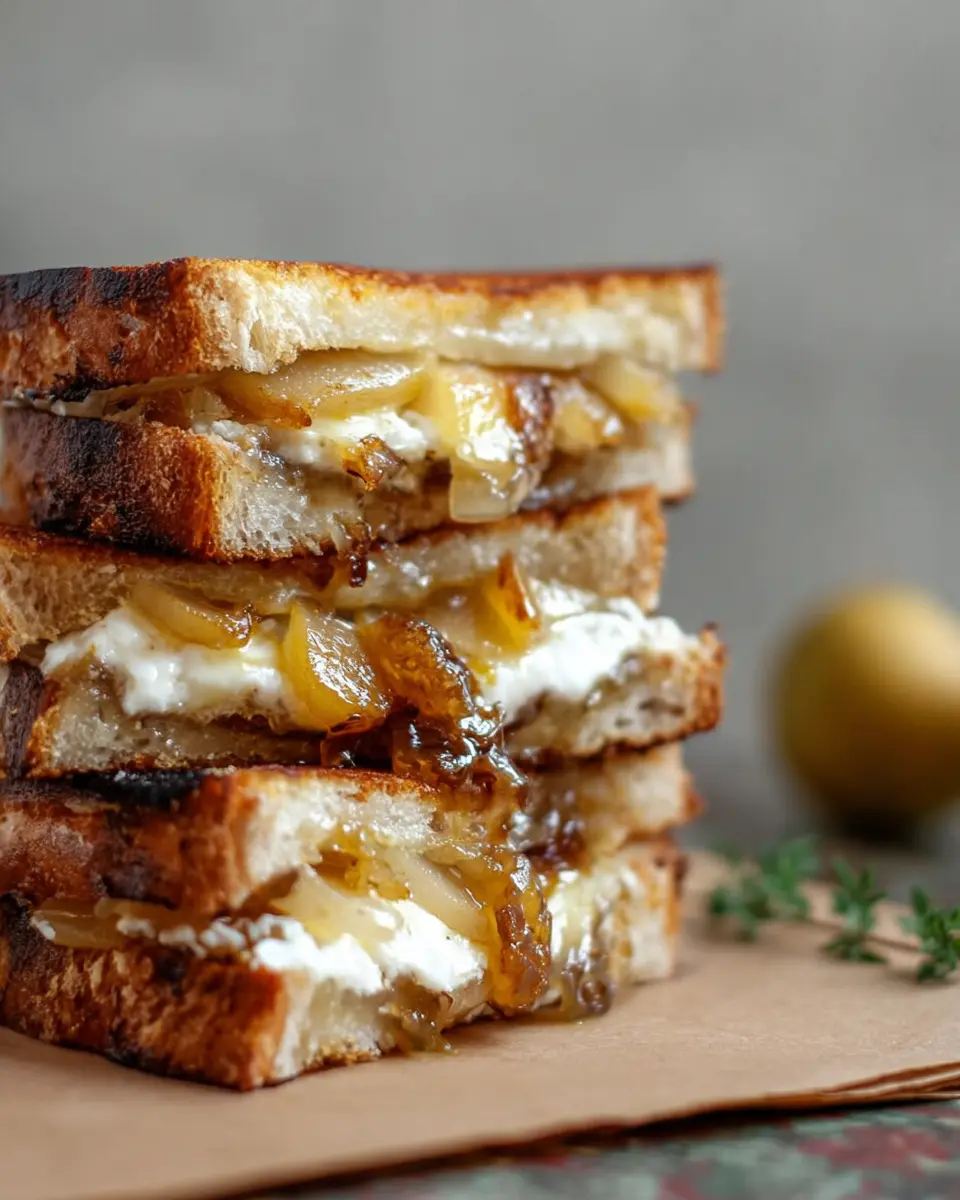
Introduction to Honey Roasted Pear Grilled Cheese
Who knew that a classic comfort food like grilled cheese could be elevated to gourmet status? The secret lies in the addition of honey roasted pears, which infuse this dish with a delightful sweetness and complexity. Unlike a typical grilled cheese, this recipe offers a beautiful balance between the rich creaminess of goat cheese and the savory depth of caramelized onions.
Imagine the smell of honey caramelizing in the oven as the pears roast—it's simply divine. The natural sugars in the pears enhance their flavor, making each bite a little taste of heaven. What’s more, pears are packed with essential vitamins and fiber, making this dish not just tasty but also a bit nutritious.
To learn how to make this culinary delight, check out this article on the health benefits of pears, and see how this fruit can elevate your meals! Not only does this recipe provide an amazing flavor experience, but it also showcases how simple ingredients can lead to extraordinary dishes.
So, if you're ready to take your grilled cheese game to the next level, let’s dive into making your own Honey Roasted Pear, Chevre, and Caramelized Onion Grilled Cheese!
Ingredients for Honey Roasted Pear Grilled Cheese
Essential ingredients for the perfect sandwich
Creating a mouthwatering Honey Roasted Pear Grilled Cheese starts with these key ingredients:
- Sweet onion: Two onions, thinly sliced, bring a savory sweetness.
- Pears: Two fresh, juicy pears, also thinly sliced, are essential for that delightful contrast.
- Olive oil: A tablespoon helps in roasting and caramelizing.
- Honey: A teaspoon is all you need to enhance the pear's natural sweetness.
- Cheddar cheese: Four ounces of bold sharp cheddar adds depth.
- Chevre: Four ounces of creamy goat cheese that melts beautifully.
- Pugliese bread: Eight slices of this rustic bread, or any high-quality alternative, provide the perfect base.
- Butter: Two tablespoons of softened butter give that golden crust we all crave.
Optional ingredients for personalized flavors
Don’t hesitate to get creative! Here are some optional ingredients to customize your sandwich:
- Spices: A dash of cinnamon or nutmeg can elevate the flavor profile.
- Nuts: Chopped walnuts or pecans can add a lovely crunch.
- Greens: Adding arugula or spinach can bring freshness.
- Cranberry sauce: A smear of this sauce can add a tart contrast to the sweetness.
By mixing and matching, you can craft a Honey Roasted Pear Grilled Cheese that’s uniquely yours!
Preparing Honey Roasted Pear Grilled Cheese
Creating the perfect Honey Roasted Pear, Goat Cheese, and Caramelized Onion Grilled Cheese is not just about assembling ingredients; it's about crafting a delightful flavor experience. Let’s walk through the steps to ensure you achieve a gourmet sandwich that's sure to impress!
Preparing the onions
Start your journey by caramelizing the onions, which will contribute a rich sweetness to your grilled cheese. Heat a skillet over medium heat and add about 1-2 teaspoons of olive oil. Once it’s shimmering, add your thinly sliced sweet onions. Season with a sprinkle of kosher salt and freshly cracked pepper to enhance their natural sweetness.
Reduce the heat to medium-low and let the onions cook slowly, stirring occasionally for about 45 minutes until they're golden and beautifully caramelized. This step requires patience, but it’s worth it! Not only do caramelized onions add depth to your sandwich, but they also fill your kitchen with an irresistible aroma.
Roasting the pears
While the onions are busy caramelizing, it’s time to roast the pears. Preheat your oven to 400°F (200°C). On a lined baking sheet, arrange your thinly sliced pears in a single layer. Drizzle with a touch of olive oil, season lightly with salt and pepper, and finish with a drizzle of honey for that luscious sweetness.
Bake the pears for about 20-25 minutes, turning the sheet halfway through for even roasting. What you’re looking for is tender, juicy fruit that becomes slightly caramelized around the edges. That explosion of flavor will make your grilled cheese truly stand out!
Assembling the grilled cheese
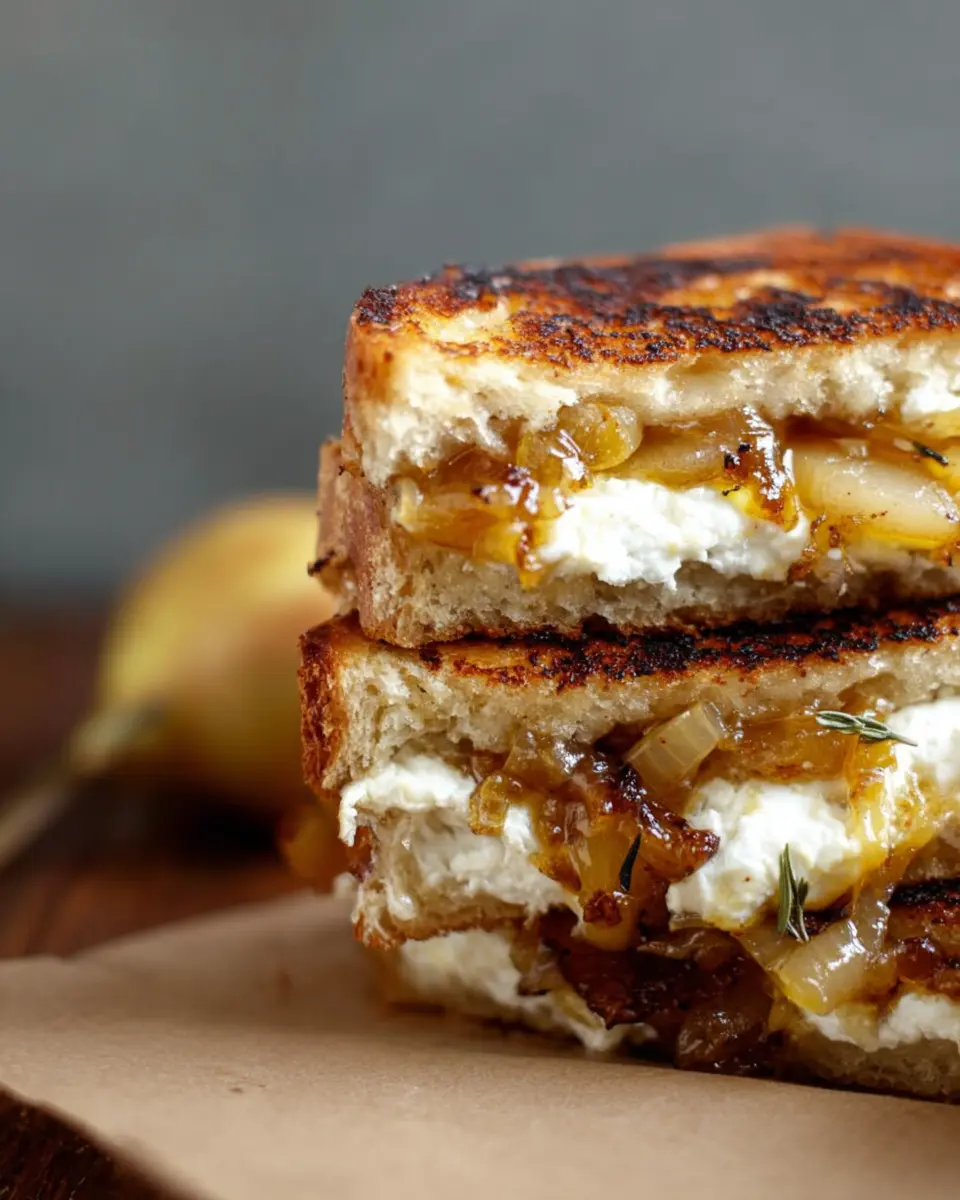
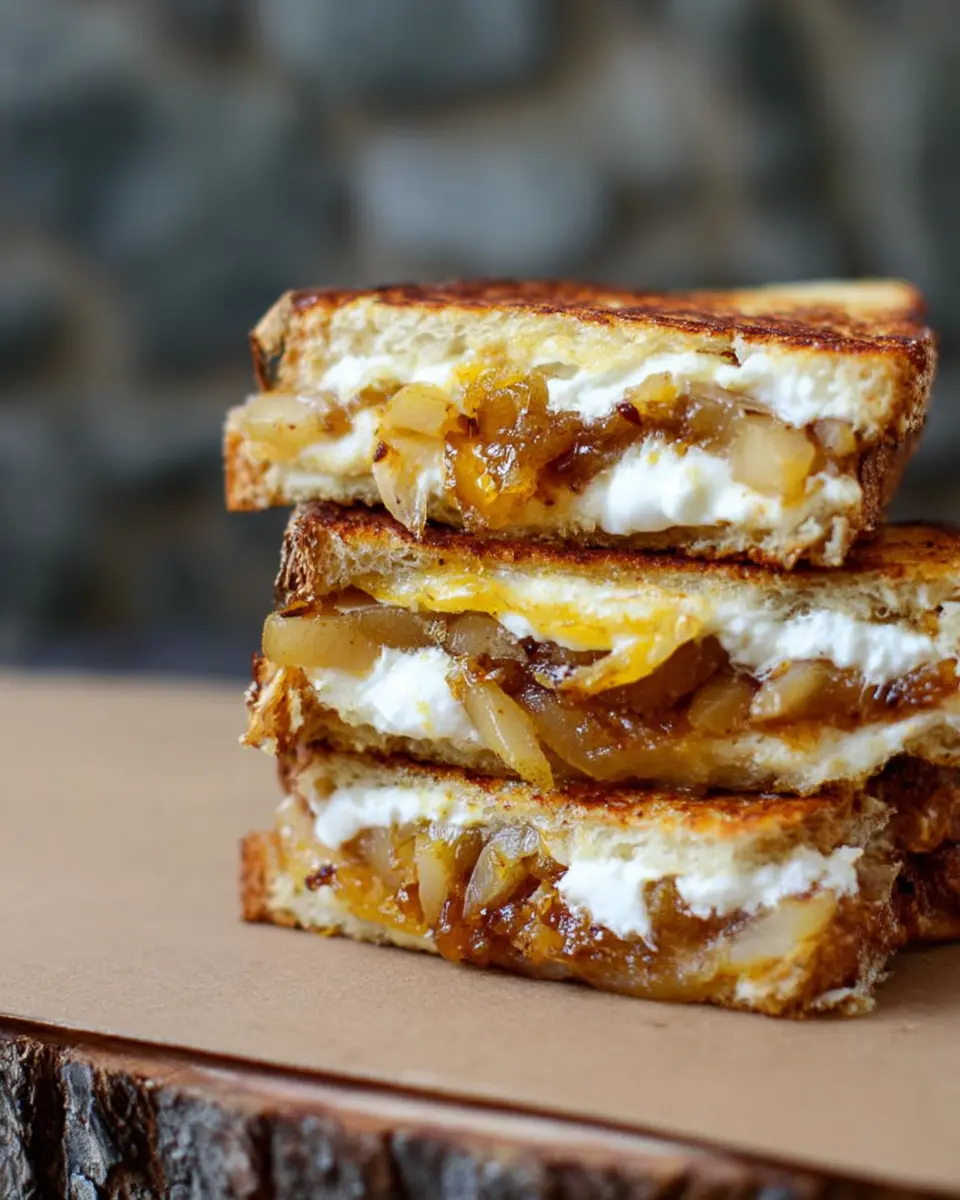
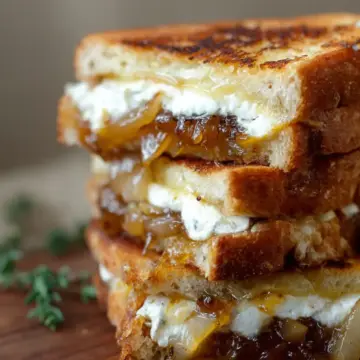
Now comes the exciting part—assembling your Honey Roasted Pear grilled cheese! Start with a slice of your favorite bread (Pugliese works wonderfully). Spread softened butter on one side, ensuring you cover all edges for a golden crust. Place the buttered side down in your skillet.
Layer on your sharp cheddar cheese, followed by the caramelized onions, and a topping of those mouth-watering honey-roasted pear slices. For the finishing touch, take another slice of bread, butter one side, and spread the soft chevre (goat cheese) on the other. Place this slice, chevre side down, atop the pears.
Cooking the sandwich
Next, heat up your skillet over medium-low heat. Gently place your assembled sandwich into the pan and cook until the cheese begins to melt and the bread turns a beautiful golden brown. Don’t rush this step—about 4-5 minutes on each side should do the trick.
For an extra touch, you can cover the pan with a lid for a couple of minutes to help the cheese reach gooey perfection. Flip the sandwich carefully and repeat for the other side.
Serving the sandwich
Once both sides are perfectly golden and the cheese is melty, it’s time to serve! Slice your grilled cheese in half to reveal the gorgeous layers of pears, onions, and cheese inside. This sandwich pairs wonderfully well with a light salad or a comforting cup of soup, creating a perfect lunch or light dinner scenario.
So go ahead, take your time, and savor each step. After all, the process can be as enjoyable as the final bite of your delicious Honey Roasted Pear grilled cheese! If you're eager for more fine-tuning, check out expert articles on caramelizing onions or the best ways to prepare roasted fruit to elevate your cooking game even further.
Happy cooking!
Variations on Honey Roasted Pear Grilled Cheese
Adding Turkey Bacon for a Savory Twist
For those craving a touch of savory goodness, consider adding crispy turkey bacon to your honey roasted pear grilled cheese. The savory, salty crunch creates a delightful contrast to the sweetness of the pears and the creaminess of the cheese. Simply cook the turkey bacon until crispy, then layer it in with the caramelized onions and pears, adding depth and flavor to each bite.
Experimenting with Different Cheeses
Cheese lovers rejoice! While this recipe calls for chevre and sharp cheddar, feel free to get creative. Try a tangy blue cheese for a bold kick or a melty Havarti for a creamier consistency. Each cheese will bring its own unique flavor profile that complements the honey roasted pear. Mixing and matching your favorites is not only fun but also a great way to customize your sandwich to your taste!
For more cheese inspiration, check out The Cheese Chronicles or The Cheese Professor to learn about cheese varieties and pairing tips!
Cooking Tips for Honey Roasted Pear Grilled Cheese
Tips for Perfect Caramelized Onions
To achieve deliciously sweet and richly flavored caramelized onions, patience is key. Cook them slowly over low heat (think 30-45 minutes) to allow the natural sugars to develop. Stir occasionally to prevent burning; a splash of water or broth can help deglaze the pan and keep things moving. For deeper flavor, try adding a pinch of sugar or a splash of balsamic vinegar towards the end!
Best Bread Choices for Grilling
When it comes to choosing the right bread for your Honey Roasted Pear grilled cheese, consider quality and texture. Pugliese is an excellent choice, but you could also opt for a rustic sourdough or a hearty whole grain. These will hold up well to the rich fillings and create that perfect, crispy exterior. Remember, good bread elevates your sandwich game!
Serving suggestions for Honey Roasted Pear Grilled Cheese
Pairing with sides for a complete meal
To elevate your Honey Roasted Pear Grilled Cheese, consider pairing it with some delightful sides. A simple arugula salad with lemon vinaigrette adds a refreshing contrast. For a heartier option, try sweet potato fries or a bowl of creamy tomato bisque. These sides not only complement the sweet and savory flavors of the sandwich but also keep your meal balanced and satisfying.
Creative presentation ideas
Presentation can make all the difference, right? Serve your Honey Roasted Pear Grilled Cheese on a rustic wooden board, alongside small bowls of dipping sauces like balsamic glaze or a zesty herb aioli. Garnish with fresh herbs for a pop of color and flavor. Stack the sandwiches high or cut them into fun shapes with cookie cutters for a playful twist.
By exploring these serving ideas, your grilled cheese experience will surely impress your family and friends! For more inspiration, check out additional sides on Food Network.
Time Breakdown for Honey Roasted Pear Grilled Cheese
Preparation Time
Prepare yourself for enriching flavors with a preparation time of 50 minutes. This time includes slicing the sweet onions and pears, as well as caramelizing the onions, which is essential for that deep, savory kick.
Cooking Time
For the cooking process, set aside an additional 10 minutes. This is when the magic happens as you grill the sandwiches to crispy perfection, allowing the cheese to melt beautifully.
Total Time
Altogether, you’ll need 1 hour to create this exquisite Honey Roasted Pear, Goat Cheese and Caramelized Onion Grilled Cheese. A small investment for a delightful culinary experience that’s perfect for lunch or dinner!
Feeling inspired to whip up this tasty grilled cheese? Explore more about the health benefits of pears and how to select the best ones here. Enjoy every bite!
Nutritional Facts for Honey Roasted Pear Grilled Cheese
Calories
Each serving of this Honey Roasted Pear Grilled Cheese packs about 481 calories. It’s a delightful mix of flavors that makes for an ideal indulgent meal without going overboard.
Protein
You’ll get around 18 grams of protein in every serving thanks to the combination of cheddar and goat cheese. This ensures that your grilled cheese isn't just tasty; it's also a good source of protein!
Sodium
With 612 mg of sodium per sandwich, it's essential to balance this treat with lower-sodium options during the day. Pair it with a simple salad or some fresh fruit to keep your overall intake in check while enjoying this unique twist on a classic comfort dish.
FAQs about Honey Roasted Pear Grilled Cheese
Can I make the honey roasted pears ahead of time?
Absolutely! You can prepare the honey roasted pears a day in advance and store them in an airtight container in the refrigerator. Just warm them up a bit before assembling your grilled cheese for that melty goodness. It’s a great time-saver and adds a wonderful depth of flavor to your sandwich.
What other ingredients can I add?
Feel free to get creative! Some tasty additions include:
- Turkey bacon for a savory crunch
- Fresh arugula for a peppery bite
- Sliced figs for extra sweetness
- Walnuts or pecans for added texture
Mixing in these options will elevate your honey roasted pear grilled cheese to a whole new level.
How do I store leftovers?
If you happen to have any leftovers (a rare occurrence with this delicious sandwich!), store them in an airtight container in the fridge. For optimal taste, reheat them in a skillet over low heat to maintain the crispy exterior and melty filling. Avoid the microwave if possible, as it can make the bread soggy. For more culinary tips, check out Serious Eats.
Conclusion on Honey Roasted Pear Grilled Cheese
In summary, this Honey Roasted Pear, Goat Cheese, and Caramelized Onion Grilled Cheese is a delightful fusion of flavors that elevates your average sandwich. Perfect for cozy nights in or impressing guests, it marries the sweetness of pears with creamy cheese. Try it out and savor the moment!
Honey Roasted Pear, Chevre and Caramelized Onion Grilled Cheese
Equipment
- Skillet
- Oven
- Baking Sheet
Ingredients
- 1 sweet onion thinly sliced
- 2 pears thinly sliced
- 1 tablespoon olive oil divided
- 1 teaspoon honey
- kosher salt
- pepper
- 4 ounces sharp cheddar grated
- 4 ounces chevre soft goat cheese
- 8 slices Pugliese or other good quality bread
- 2 tablespoons butter softened
Instructions
- Preheat oven to 400°F degrees.
- Heat a skillet over medium heat. Add 1-2 teaspoons olive oil. Add the onions, season with salt and pepper, toss to coat. Reduce heat to medium low and cook, stirring often, until brown and caramelized, about 45 minutes.
- While onions are cooking, place pear slices in a single layer on a lined baking sheet. Brush with a little olive oil and lightly season with salt and pepper. Drizzle with honey. Bake until tender, 20-25 minutes, rotating pan halfway through.
- To assemble sandwiches, spread softened butter on one side of a slice of bread, and be sure to cover all the way to the edges. Place butter side down. Top with shredded cheese, then onions, then layer with pear slices. On a second piece of bread, spread butter on one side and chevre on the other side. Place chevre side on top of the pears, butter side up.
- Heat a skillet over medium low heat. When hot, place sandwich in pan and cook until cheese starts to melt and outside of bread is golden. Flip and repeat.


Leave a Reply