
Introduction to Red Velvet Cheesecake
Why Red Velvet Cheesecake is a Must-Try
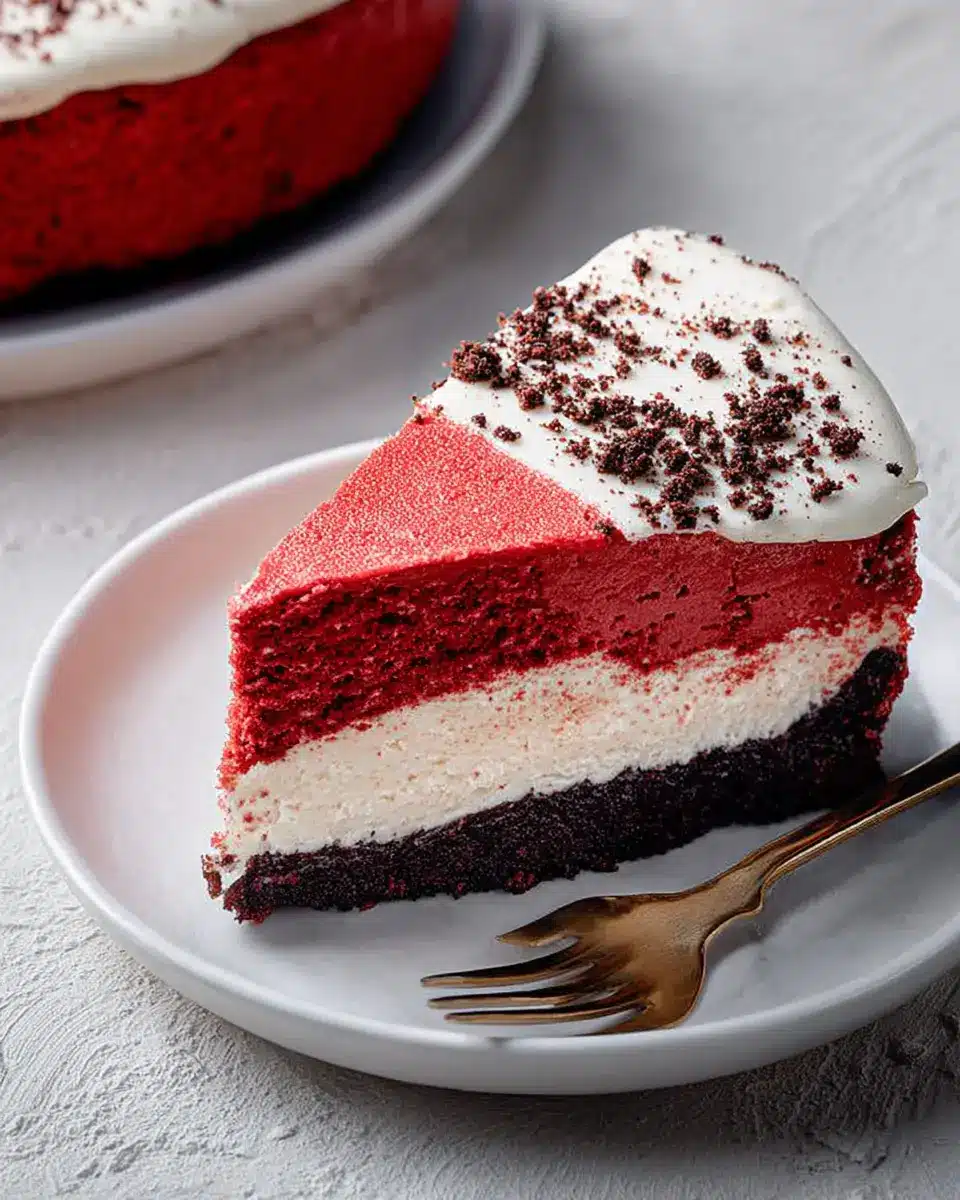
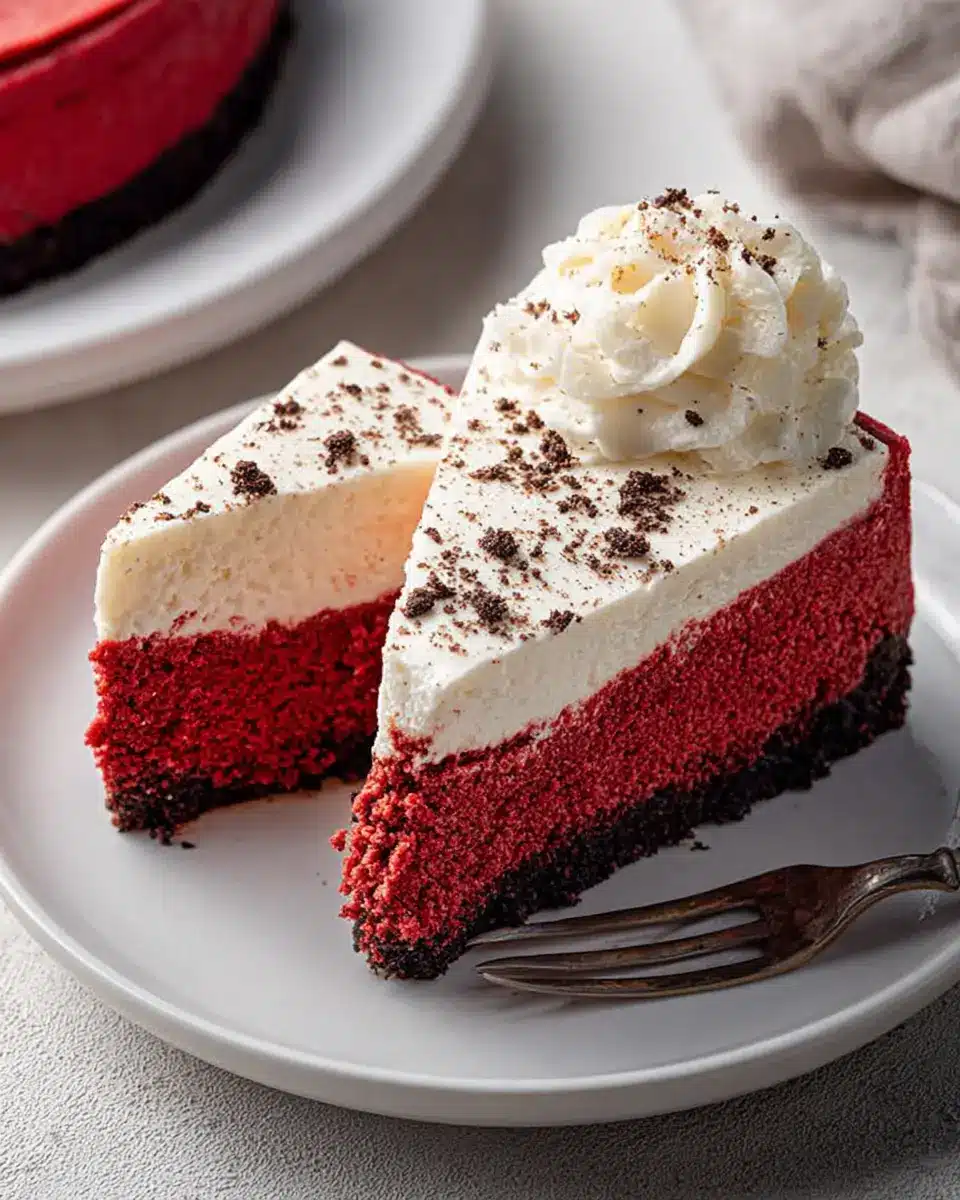
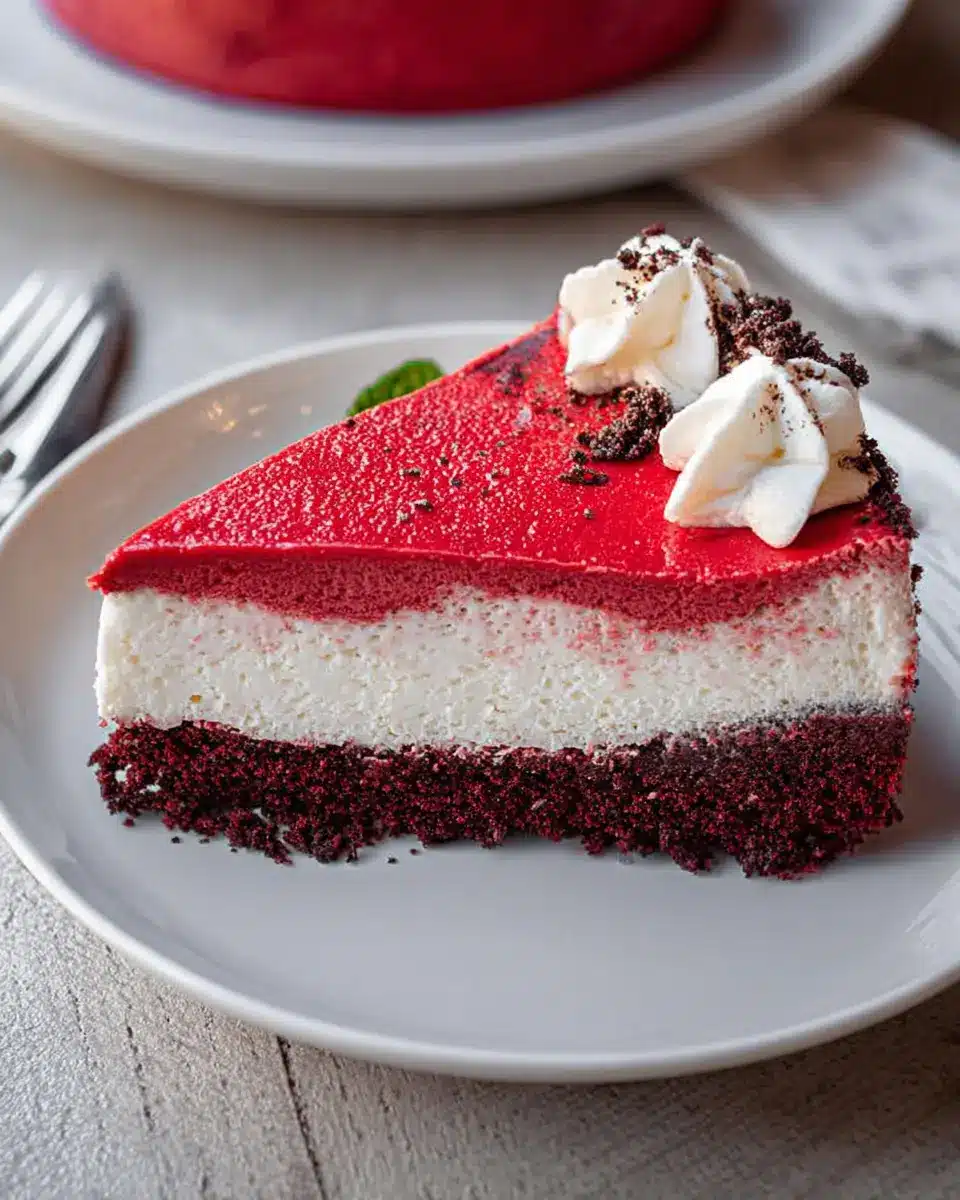
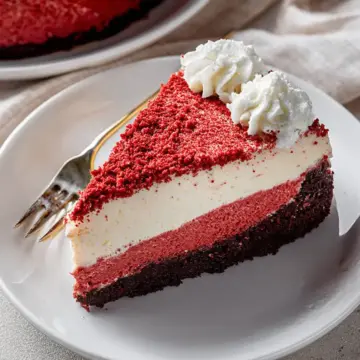
Are you looking to impress at your next gathering? Red velvet cheesecake is your secret weapon! Combining the classic flavors of red velvet cake with the rich creaminess of cheesecake, this dessert offers a visual treat that’s just as delicious as it is stunning. With its vibrant hue and velvety texture, it's a showstopper that can elevate any occasion.
But why stop there? This delightful cheesecake doesn’t just look good; it tastes even better. The chocolate cream Oreo crust complements the cheesecake filling beautifully, while the hint of cocoa adds depth to the flavor profile. It’s a perfect balance of sweet and slightly tangy thanks to the cream cheese and sour cream. Plus, it's surprisingly easy to make, even for those of us who aren’t professional bakers!
Did you know that red velvet cake has roots dating back to the Victorian era? For those interested in cake history, you can read more about it here. So whether you are serving it at a birthday party or just for a cozy night in, red velvet cheesecake promises to be a delightful experience for your palate. Get ready to savor each bite!
Ingredients for Red Velvet Cheesecake
Creating a sumptuous red velvet cheesecake starts with gathering the right ingredients. Here’s a breakdown to help you get everything you need to impress your friends and family.
Essential Ingredients for the Crust
- Chocolate Cream Oreo Cookies: 17, crushed to form a rich and chocolaty base.
- Butter: ¼ cup, melted to bind the cookie crumbs together.
- Sugar: Just 1 tablespoon to add a hint of sweetness.
Filling Components
The heart of your red velvet cheesecake is the luscious filling. You’ll need:
- Cream Cheese: 3 packages (8 ounces each), softened for a smooth texture.
- Sugar: 1-½ cups for the perfect sweetness.
- Sour Cream: 1 cup adds tanginess and moisture.
- Buttermilk: ½ cup for that classic red velvet flavor.
- Baking Cocoa: 3 tablespoons to enhance richness.
- Vanilla Extract: 2 teaspoons for depth.
- Eggs: 4 large, room temperature, and lightly beaten for creaminess.
- Red Food Coloring: 1 bottle (1 ounce) for that trademark color.
Frosting Ingredients
To crown your red velvet cheesecake, gather these frosting essentials:
- Cream Cheese: 3 ounces, softened for spreadability.
- Butter: ¼ cup, also softened, for a velvety finish.
- Confectioners' Sugar: 2 cups to achieve that perfect sweetness.
- Vanilla Extract: 1 teaspoon, because vanilla makes everything better!
With these ingredients in hand, you’re well on your way to crafting a delicious red velvet cheesecake. For best results, ensure you measure carefully, and remember: quality matters! Happy baking!
Step-by-Step Preparation of Red Velvet Cheesecake
Creating a luxurious red velvet cheesecake can feel like an awe-inspiring task, but with this step-by-step guide, you’ll find that it’s more achievable than you think! Let’s dive into the process together.
Prep Your Kitchen and Ingredients
Before you get your hands dirty, it’s essential to ready your kitchen for action. Start by gathering all your ingredients and tools. Here’s what you’ll need:
- 9-inch springform pan
- Mixing bowls
- Whisk or hand mixer
- Measuring cups and spoons
- Heavy-duty foil
Remember to preheat your oven to 325°F. This is a crucial step to ensure your cheesecake bakes evenly. A well-organized kitchen not only streamlines your workflow but also minimizes the chance of forgetting any ingredients—trust me, it happens!
Create the Crust
Let’s get that crust ready! In a small bowl, mix together 17 crushed chocolate cream Oreo cookies with ¼ cup melted butter and 1 tablespoon of sugar. Once the mixture resembles wet sand, press it firmly into the bottom of your springform pan. A well-formed crust gives your cheesecake structure and a delightful crunch that contrasts beautifully with the filling.
Make the Creamy Cheesecake Filling
Now, the fun part: the filling! In a large bowl, beat together 3 packages of softened cream cheese and 1-½ cups of sugar until smooth. Gradually mix in 1 cup of sour cream, ½ cup of buttermilk, 3 tablespoons of baking cocoa, and 2 teaspoons of vanilla extract. Make this filling feel ultra-smooth, as it will elevate the final texture.
The next step is to add your lightly beaten 4 large eggs one at a time, beating on low just until blended. Finally, mix in 1 ounce of red food coloring. This is where your cheesecake transforms into the charming red velvet color. Pour the creamy filling over the crust, ensuring an even distribution.
Bake the Cheesecake
Place the springform pan inside a larger baking pan and add about an inch of hot water into the larger pan. This water bath technique helps prevent your cheesecake from cracking during baking. Bake for about 60 to 70 minutes, or until the center is just set and the top appears dull. Remember, patience is a virtue here!
Cool and Frost Your Cheesecake
Once baked, carefully remove the springform pan from the water bath. Cool on a wire rack for about 10 minutes, and then run a knife around the edge to loosen. Cool it for another hour at room temperature before refrigerating overnight. This overnight chill helps enhance the flavors and solidifies the texture.
When ready to serve, prepare a simple frosting by beating together 3 ounces of softened cream cheese and ¼ cup of butter until fluffy. Gradually mix in 2 cups of confectioners’ sugar and 1 teaspoon of vanilla extract until smooth. Top your chilled cheesecake with this luscious frosting for a decadent finish.
And voilà! You’ve crafted a stunning red velvet cheesecake that’s sure to impress. Whether it's a special occasion or a casual treat, this dessert is a showstopper! For some tips on variations or other delicious cheesecakes, check out Taste of Home. Enjoy your baking adventure!
Variations of Red Velvet Cheesecake
Mini Red Velvet Cheesecakes
Looking to satisfy a smaller crowd or perhaps save some for later? Mini red velvet cheesecakes are perfect! Simply prepare the crust as directed, but portion out the filling into cupcake liners or mini springform pans. Bake them for a shorter time — around 20-25 minutes should do the trick. These bite-sized delights are excellent for parties or as a little treat on a cozy night in. They also make great gifts when packaged in a cute box.
No-Bake Red Velvet Cheesecake Option
Craving red velvet cheesecake but don’t want to turn on the oven? No problem! A no-bake version is fantastically easy to prepare. Use crushed Oreo cookies for the base and mix the filling ingredients using a hand mixer until smooth. Fold in some whipped cream for an airy texture, then pour into your crust. Refrigerate for at least four hours, and you'll have a luscious dessert that's sure to impress without any baking fuss. Curious about more no-bake treats? Check out this no-bake cheesecake recipe for inspiration!
Cooking Tips and Notes for Red Velvet Cheesecake
Ensuring a Perfectly Smooth Batter
To achieve a silky-smooth batter for your red velvet cheesecake, ensure all your ingredients are at room temperature before mixing. This allows for better incorporation and minimizes lumps. When blending your cream cheese and sugar, beat until creamy, which breaks down any remaining solids. Consider using a hand mixer for even blending. Don’t rush—slow and steady mixing is key!
Tips for Achieving the Right Texture
For the ideal texture, remember that overmixing can lead to a dense cheesecake. Once you add the eggs, mix just until combined. Additionally, using a water bath during baking helps regulate temperature and prevents cracks. If you want to take it further, allow your cheesecake to cool slowly before refrigerating; this helps set the texture perfectly. Enjoy your baking adventure!
Serving Suggestions for Red Velvet Cheesecake
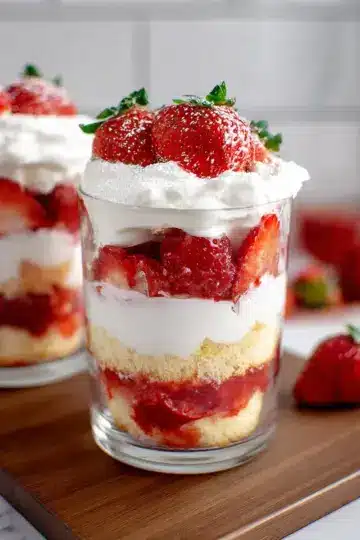
Pairing with Fresh Berries
Elevate your red velvet cheesecake experience by serving it with fresh berries. Think ripe strawberries, blueberries, and raspberries that add a vibrant pop of color and a refreshing tartness. The combination of creamy cheesecake and juicy berries creates a delightful contrast in both flavor and texture. Plus, berries are rich in antioxidants, making this dessert feel a little more guilt-free. For a stunning presentation, arrange the berries on top or alongside each slice, turning your cheesecake into a show-stopping centerpiece for any occasion.
Serving with Whipped Cream
A dollop of fluffy whipped cream is a classic pairing that complements the rich, velvety texture of red velvet cheesecake. You can whip your own cream for that homemade touch or use store-bought for convenience. Consider adding a hint of vanilla or a sprinkle of cocoa powder for extra flair. This light and airy element balances the dense, creamy cheesecake beautifully. For a little extra indulgence, why not drizzle some chocolate syrup on top? Your guests will surely be coming back for seconds! Want more inspiration? Check out this guide on perfect whipped cream techniques.
Time Breakdown for Red Velvet Cheesecake
When it comes to making an irresistible red velvet cheesecake, organization is key! Here's your handy time breakdown:
Preparation Time
Spend about 30 minutes prepping this delicious masterpiece. You'll be combining ingredients, crushing Oreos, and mixing your creamy filling.
Cooking Time
Let your cheesecake bake for 60 to 70 minutes. This is when the magic happens as it transforms into a rich, velvety delight.
Cooling Time
Allow it to cool for a total of about 2 hours before refrigerating overnight. This step is crucial for achieving that perfect texture!
By following these time guidelines, you'll be well on your way to serving an impressive red velvet cheesecake for your next gathering! For more tips on baking, check out resources from the American Institute of Baking or Food Network. Happy baking!
Nutritional Facts for Red Velvet Cheesecake
Calories per Slice
Indulging in a slice of red velvet cheesecake? You can expect approximately 463 calories per piece. This delightful dessert is perfect for special occasions!
Key Nutritional Information
Here’s a quick breakdown of the essential nutrition facts per slice:
- Fat: 29g (including 17g saturated fat)
- Cholesterol: 131mg
- Sodium: 276mg
- Carbohydrates: 46g (39g sugars, 1g fiber)
- Protein: 7g
For those seeking to keep track of their nutritional intake, this rich cheesecake still offers a decent protein boost, making it a satisfying treat. If you want a more in-depth look at ingredients, check out resources like the USDA FoodData Central for nutritional insights!
FAQ about Red Velvet Cheesecake
Can I use low-fat cream cheese?
Absolutely! While using low-fat cream cheese will make your red velvet cheesecake a bit lighter, it may impact the creaminess and texture slightly. If you're looking for a healthier twist, go for it—just keep in mind that the cheesecake may not be as rich.
How long will the cheesecake last in the fridge?
Your red velvet cheesecake can be stored in the fridge for about 5-7 days. Make sure to cover it well with plastic wrap or foil to keep it fresh. If you’re planning to indulge later, you can also freeze individual slices for up to two months!
What can I use as a substitute for buttermilk?
If you don’t have buttermilk on hand, don’t worry! You can easily make a substitute by mixing one tablespoon of white vinegar or lemon juice with enough milk to make 1 cup. Let it sit for about 5 minutes, and voilà! You’re all set to continue with that delicious red velvet cheesecake. For more tips, check out this helpful guide on ingredient substitutions.
Conclusion on Red Velvet Cheesecake
Creating a delightful red velvet cheesecake is an experience worth savoring. This indulgent dessert combines the rich flavors of cream cheese with the iconic red velvet taste, perfect for any special occasion. Impress friends and family with this showstopper — they’ll be asking for seconds! For more variations, explore Taste of Home.
Red Velvet Cheesecake
Equipment
- springform pan
- large baking pan
- Mixing Bowls
Ingredients
Crust
- 17 cookies chocolate cream Oreo cookies, crushed
- ¼ cup butter, melted
- 1 tablespoon sugar
Filling
- 3 packages (8 ounces each) cream cheese, softened
- 1.5 cups sugar
- 1 cup sour cream
- ½ cup buttermilk
- 3 tablespoons baking cocoa
- 2 teaspoons vanilla extract
- 4 large eggs, room temperature, lightly beaten
- 1 bottle (1 ounce) red food coloring
Frosting
- 3 ounces cream cheese, softened
- ¼ cup butter, softened
- 2 cups confectioners' sugar
- 1 teaspoon vanilla extract
Instructions
Preparation
- Preheat oven to 325°. Place a greased 9-in. springform pan on a double thickness of heavy-duty foil (about 18 in. square). Securely wrap foil around pan.
- In a small bowl, combine the cookie crumbs, butter and sugar. Press onto the bottom of prepared pan.
- In a large bowl, beat cream cheese and sugar until smooth. Beat in sour cream, buttermilk, cocoa and vanilla until smooth. Add eggs; beat on low speed just until blended. Stir in food coloring. Pour over crust. Place springform pan in a large baking pan; add 1 in. hot water to larger pan.
- Bake until center is just set and top appears dull, 60-70 minutes. Remove springform pan from water bath. Cool on a wire rack for 10 minutes. Carefully run a knife around inside edge of pan to loosen; cool 1 hour longer. Refrigerate overnight, covering when completely cooled. Remove side of pan.
- For frosting, in a small bowl, beat cream cheese and butter until fluffy. Add confectioners’ sugar and vanilla; beat until smooth. Frost top of cheesecake. Refrigerate until serving.

Leave a Reply