
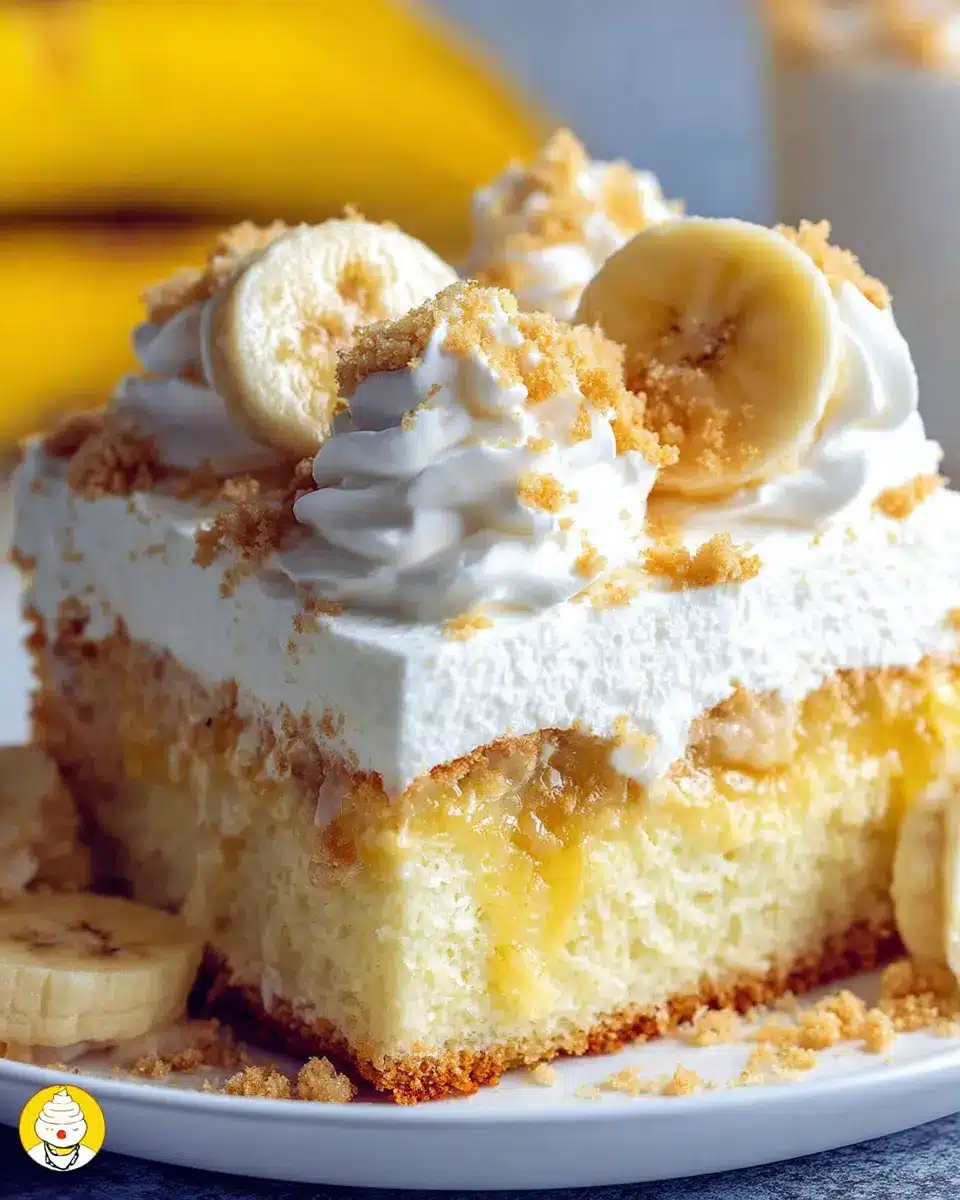
Introduction to Banana Pudding Poke Cake
The nostalgic journey of banana pudding
Many of us have fond memories tied to the sweet, creamy delight of banana pudding. Whether it was a summer picnic or a family gathering, this beloved dessert has a special place in American cuisine. As we reminisce about Grandma's recipes or that little diner down the street, it becomes clear that banana pudding isn’t just a dish—it's a symbol of comfort and joy. The delicious layers of pudding, whipped cream, and crunchy Nilla Wafers evoke feelings of warmth and nostalgia, making it a timeless favorite.
Why poke cakes are the ultimate dessert
Now, let's talk about poke cakes. These ingenious creations are not only fun to make but deliver flavor in every bite. By poking holes into a baked cake and infusing it with creamy fillings—like our charming banana pudding—you transform a simple dessert into a layered masterpiece that captivates taste buds. The beauty of poke cakes lies in their versatility; they can easily adapt to any flavor profile. Taking a classic dessert like banana pudding and turning it into a poke cake allows you to enjoy the best of both worlds: simplicity and indulgence.
Ready to venture into the whimsical world of Banana Pudding Poke Cake? Let’s get baking!
Ingredients for Banana Pudding Poke Cake
Essential ingredients for the cake
Creating the perfect banana pudding poke cake starts with a few essential ingredients. You'll need:
- 1 box of yellow cake mix - This is your base for the cake. The flavor will complement the bananas perfectly.
- Ingredients to make the cake - Follow the box instructions, typically including eggs, oil, and water. Be sure to look at the specific amounts required on the package!
These elements come together to form a deliciously soft cake that serves as the canvas for your luscious pudding.
Pudding and topping components
Next, let’s dive into the key components that make this dessert irresistible:
- 2 (3.4 ounce) packages of instant banana pudding - This is where the magic happens. The instant variety sets up quickly and blends seamlessly.
- 4 cups of cold milk - Using whole or 2% milk will give a richer taste. Just avoid the skim milk; you'll want that creaminess!
- 8-ounce tub of frozen whipped topping (like Cool Whip) - This provides a light, fluffy layer on top.
- 20 crushed vanilla wafers - These add a delightful crunch and a hint of extra sweetness.
With these ingredients, you're just a few steps away from creating a dessert that will wow everyone! If you want to explore more about pudding varieties or cake mix tactics, check out resources like The Spruce Eats.
Step-by-step preparation of Banana Pudding Poke Cake
Creating a banana pudding poke cake is a delightful kitchen adventure that promises a delightful dessert experience. Follow these easy steps to whip up this delicious treat that will surely impress your friends and family.
Gather your ingredients
Before diving into the cooking process, it's important to get organized. Here’s what you’ll need:
- 1 box yellow cake mix
- Ingredients specified on the back of the cake mix (usually eggs, oil, and water)
- 2 (3.4 ounce) packages of instant banana pudding
- 4 cups of cold milk (whole or 2% milk works best)
- 8 ounces of thawed frozen whipped topping (like Cool Whip)
- 20 crushed Nilla Wafers
Having everything at hand will make your cooking experience smoother and more enjoyable. You can find these ingredients in most grocery stores, or check out this guide on pantry essentials for ideas on what to keep in stock.
Prepare the yellow cake mix
Start by preheating your oven according to the instructions on the yellow cake mix box. In a large mixing bowl, combine the cake mix with the specified eggs, oil, and water. Mix until the batter is smooth and well combined. Pour the batter into a greased 9×13-inch baking dish. Bake according to the package directions, usually around 30 minutes, or until a toothpick inserted comes out clean. Let it cool for a few minutes once out of the oven.
Poke the holes in the baked cake
Now it’s time for the fun part! Take a wooden spoon handle (or a similar item) and start poking holes in the cake. Aim for evenly spaced holes that reach down to the bottom. This step is crucial as it allows the creamy banana pudding to seep into the cake, creating that delightful flavor infusion typical of a banana pudding poke cake.
Whisk the banana pudding
In a separate bowl, whisk together the two packages of banana pudding with 4 cups of cold milk. Stir quickly until the mixture is smooth and lump-free, but be careful not to let it thicken too much before pouring.
Pour pudding over the cake
Once your pudding mixture is ready, it’s time to pour! Gently pour the pudding over the cake, making sure to fill in the holes as you go. Use the back of a spoon to spread it out evenly, ensuring every part of the cake gets a taste of that sweet banana goodness.
Chill the cake in the refrigerator
Cover your cake with plastic wrap and transfer it to the refrigerator. Allow it to chill for about 2 hours. This cooling time is essential for the pudding to set and for the flavors to meld beautifully.
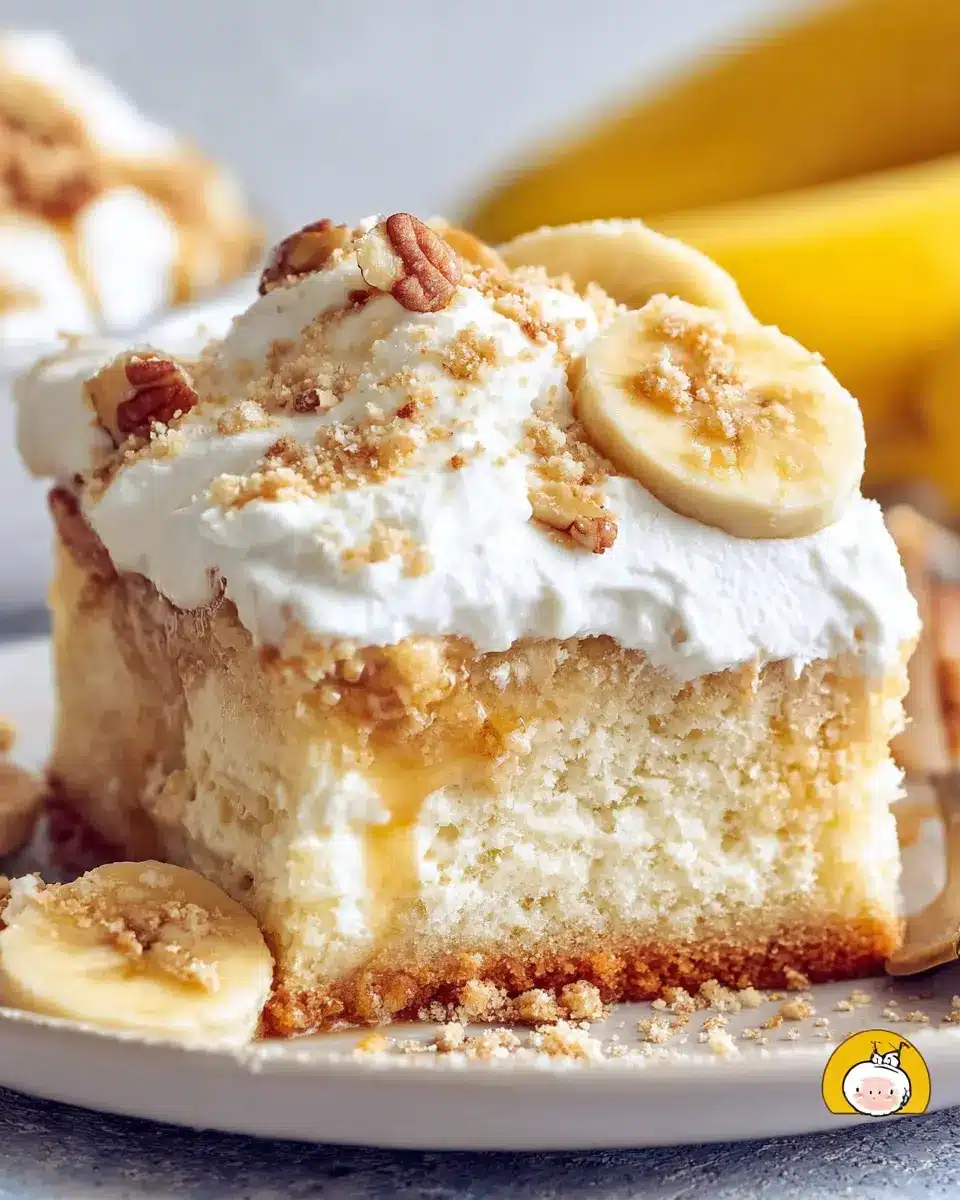
Add Cool Whip and crushed Nilla Wafers
After the chilling period, take the cake out and spread the Cool Whip evenly over the top. Finish off by sprinkling the crushed Nilla Wafers on top. For an added crunch, you might consider serving the crushed wafers on each slice to keep them fresh, as noted on this dessert expert’s blog.
And there you have it! Your mouth-watering banana pudding poke cake is ready to be enjoyed. Slice, serve, and bask in the compliments!
Variations on Banana Pudding Poke Cake
Add fresh bananas for extra flavor
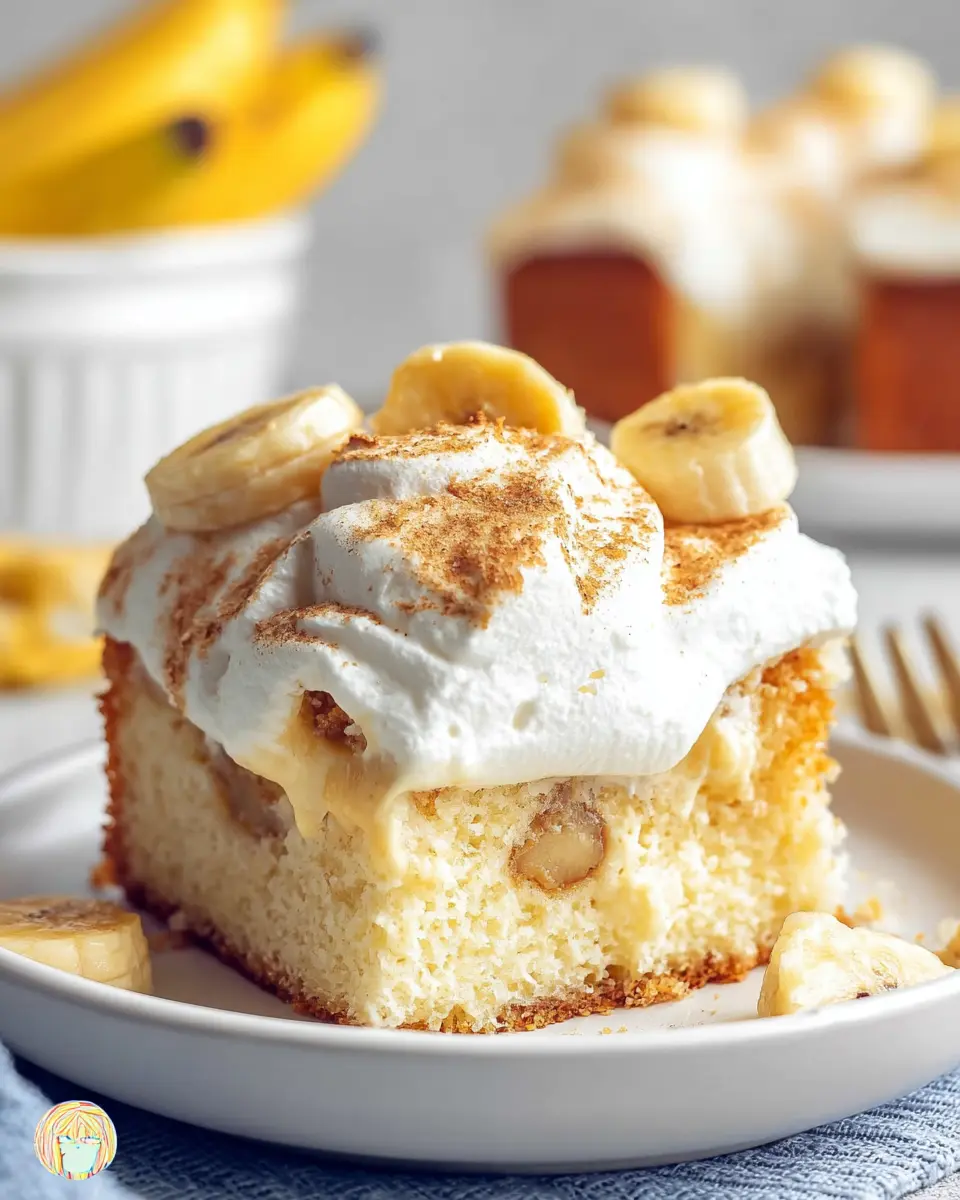
Elevate your banana pudding poke cake by layering in some fresh banana slices between the pudding and whipped topping. Not only does this add a burst of freshness, but it also creates a delightful texture contrast. If you want to make it even more indulgent, try caramelizing the bananas lightly in a skillet before adding them for an extra layer of flavor.
Experiment with different pudding flavors
Don't be afraid to mix things up! While banana pudding is classic, you can swap it for other flavors like vanilla, chocolate, or even butterscotch. Each variation will give your pudding poke cake a unique twist that keeps it exciting. For more ideas on variations, check out this pudding flavor guide.
Cooking tips and notes for Banana Pudding Poke Cake
Ensure proper hole size for maximum flavor absorption
When you’re making your banana pudding poke cake, the key to a decadent treat lies in the holes you poke in the cake. Aim for roughly 1-inch spaced holes using the handle of a wooden spoon. This allows the luscious banana pudding to seep deep into the cake, ensuring every bite is bursting with flavor!
Storage tips for freshness
To keep your banana pudding poke cake fresh, cover it tightly with plastic wrap or aluminum foil and store it in the refrigerator. It’s best enjoyed within 2-3 days for optimum taste and texture. If you want to maintain the crunch of the Nilla Wafers, consider adding them right before serving. For more storage tips, check out Food Network's guide on cake storage.
Serving suggestions for Banana Pudding Poke Cake
Pair with fresh fruit
Elevate your banana pudding poke cake experience by serving it with fresh fruit! Sliced strawberries or ripe berries add a vibrant color and refreshing flavor that perfectly balances the rich, creamy cake. You can even create a delightful fruit salad on the side for an extra pop of freshness. It makes for a beautiful presentation and enhances the overall taste, making each bite even more enjoyable.
Best occasions for serving this dessert
This banana pudding poke cake is perfect for nearly any occasion! Whether it's a summer barbecue, a birthday celebration, or simply a cozy family gathering, this dessert will surely be a hit. Its nostalgic flavors evoke childhood memories of picnics and potlucks, making it an ideal choice for casual get-togethers. Additionally, you can easily scale this recipe up or down, making it versatile enough for intimate dinners or larger parties alike. Don’t forget to check out our Banana Pudding FAQs for more fun serving ideas!
Time Breakdown for Banana Pudding Poke Cake
Preparation Time
Getting started on your Banana Pudding Poke Cake is quick and easy! With just 25 minutes to gather ingredients, mix, and prepare your cake, you’ll be well on your way to a delicious dessert.
Baking Time
Once your mixture is ready, pop it in the oven for about 30 minutes. This is when your kitchen will start to smell heavenly, so consider preheating the oven while you prepare!
Chilling Time
After baking, the cake needs some quality time in the fridge. Let it chill for at least 2 hours to ensure the pudding sets perfectly and the flavors meld, making each bite unforgettable.
Looking for more dessert inspiration? Check out these recipes for No-Bake Cheesecake or Chocolate Lava Cake!
Nutritional Facts for Banana Pudding Poke Cake
Calories per serving
Each slice of banana pudding poke cake contains approximately 270 calories. This delightful dessert offers a satisfying sweet treat without going overboard on calories.
Sugar content
You'll find about 26 grams of sugar in every serving, contributing to its rich, indulgent flavor. Being mindful of sugar intake can help you fully enjoy this dessert while balancing your diet.
Serving size
The recipe serves 12, making it perfect for gatherings or family meals. Enjoy sharing this delicious cake, or keep it all to yourself for a well-deserved treat throughout the week!
For more nutritional insights, consider checking resources like U.S. Department of Agriculture for detailed food data.
FAQs about Banana Pudding Poke Cake
Can I use a cake mix other than yellow?
Absolutely! While the classic banana pudding poke cake recipe calls for yellow cake mix for that delightful, buttery flavor, you can experiment with other flavors like white cake or even butter cake. Just keep in mind that this may change the final taste a bit, so choose what suits your palate best!
How can I keep the wafers crunchy?
To ensure your banana pudding poke cake has that satisfying crunch, try sprinkling the crushed Nilla Wafers on top just before serving. This little trick prevents them from getting soggy in the pudding. Alternatively, you can serve the wafers on the side and let guests add them as they please.
What should I do if I can't find banana pudding?
No banana pudding? No problem! You can substitute it with vanilla pudding or even a butterscotch mix. For an extra hint of banana flavor, consider adding mashed ripe bananas into the pudding mixture. Whichever option you choose, the final result will still be a delightful dessert!
For more tips and tricks, check out this resource for baking insights. Happy baking!
Conclusion on Banana Pudding Poke Cake
In summary, banana pudding poke cake is not just dessert; it's a delightful journey for your taste buds. With its easy preparation, creamy layers, and nostalgic flavors, it’s perfect for any gathering. Try this recipe and watch it disappear quickly—just remember to savor every bite!

Banana Pudding Poke Cake
Equipment
- Oven
- Mixing Bowl
- Whisk
- wooden spoon
- 9x13-inch Baking Dish
- Refrigerator
Ingredients
Cake Ingredients
- 1 box yellow cake mix
- ingredients needed to make cake: eggs, oil and water use the amounts given on the back of the box
Pudding Ingredients
- 2 packages instant banana pudding (3.4 ounces each)
- 4 cups cold milk preferably whole or 2% milk
Topping Ingredients
- 8 ounces frozen whipped topping, thawed (Cool Whip)
- 20 pieces vanilla wafers, crushed
Instructions
Cake Preparation
- Prepare 1 box yellow cake mix with ingredients needed to make cake: eggs, oil and water according to package directions for a 9×13-inch cake.
- Once cake comes out of the oven, allow it to cool for just a couple of minutes.
- Using a wooden spoon handle, poke holes in the cake, making sure they are big enough for the pudding to seep in.
Pudding Application
- In a bowl, whisk together 2 (3.4 ounce) packages instant banana pudding with 4 cups cold milk, stirring quickly until smooth.
- Pour the pudding over the cake, ensuring it fills the holes as much as possible.
- Spread the pudding evenly and gently push it down into the holes with the back of a spoon.
- Refrigerate the cake to set and cool for about 2 hours.
- Once cooled, spread the thawed whipped topping over the cake.
- Sprinkle the crushed vanilla wafers on top before serving. Keep refrigerated.


Leave a Reply